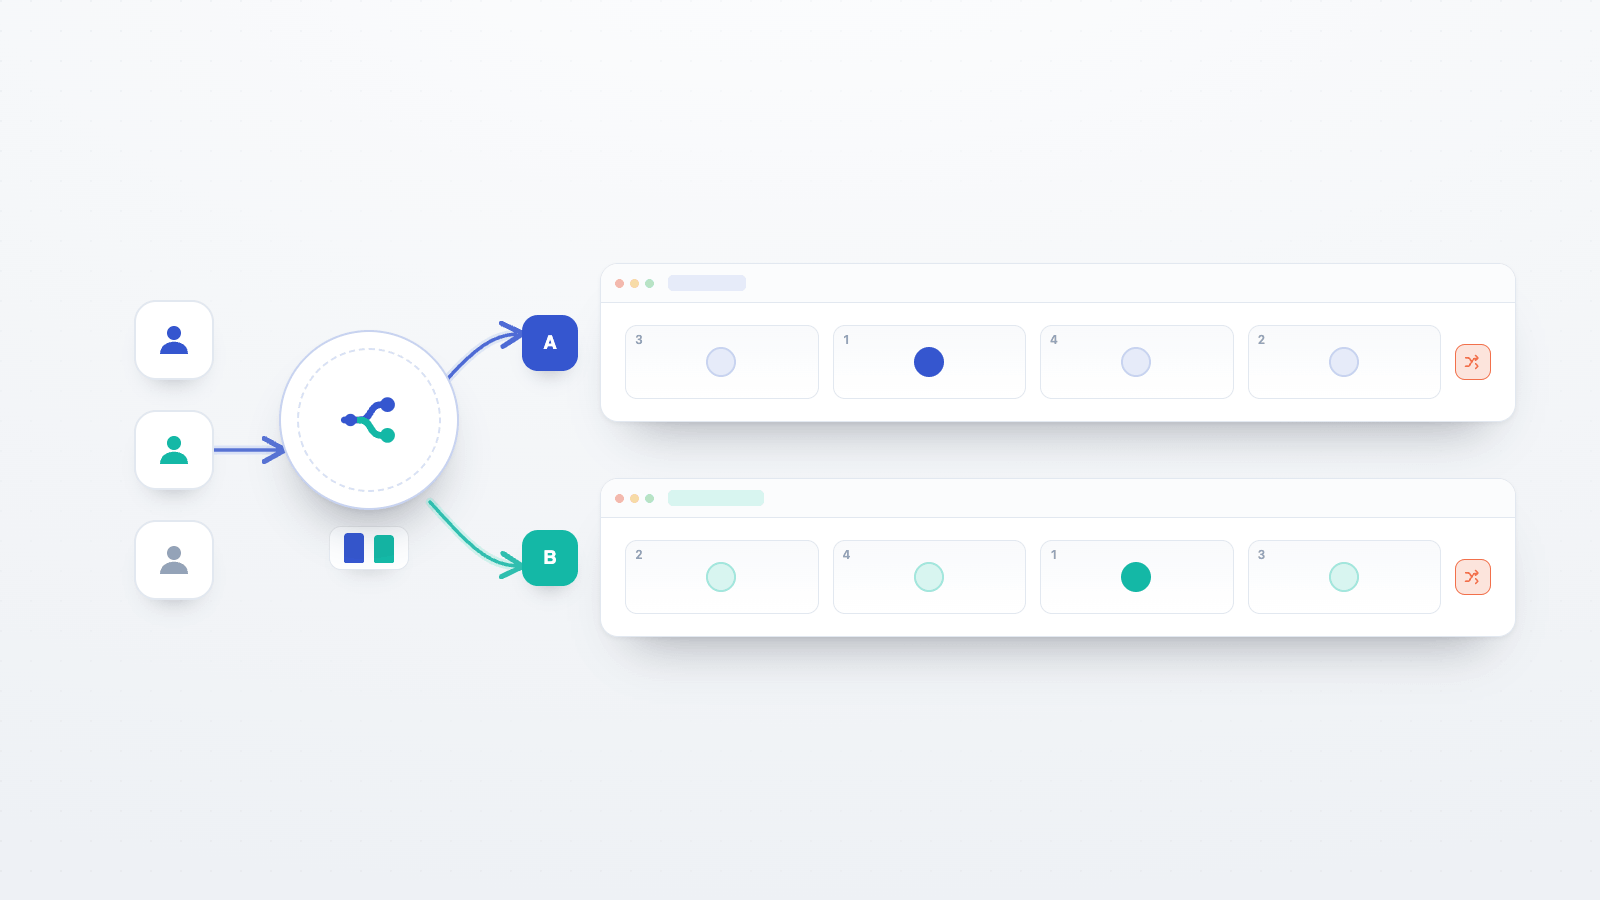
The moment a design grows past one condition, a practical question arrives before any of the science: how does each participant end up in the right group, seeing only what that group is supposed to see, without anyone hand-sorting them? For an online study the answer is randomization — but "randomization" quietly means two different things, and mixing them up is the most common way a multi-condition study goes wrong.
The two things are:
- Which condition does this participant get? In a between-subjects design — where each participant experiences only one condition, assigned at random — this is the core decision.
- In what order, and with which items, does this participant work through that condition? Trial order, which stimuli appear, whether the response keys are counterbalanced.
These belong at different layers of the toolchain. The first is a study-level job, handled by Open Lab's group-assignment tools. The second is a task-level job, handled inside the lab.js task itself. Get the split right and a multi-condition study is mostly wiring; get it wrong and you either give everyone the same condition or randomize the thing you meant to hold fixed.
The rule of thumb
Before touching any settings, decide which layer a given source of variation belongs to:
- If the thing that varies is the arm of the design a person is in — a different instruction, a different manipulation, group A versus group B — randomize it at the study level.
- If the thing that varies is the order or selection a person experiences within their arm — the sequence of trials, which items are drawn, left/right response mapping — randomize it inside the task.
A quick test: ask whether two participants who differ on this dimension are in different conditions of your design, or in the same condition experienced differently. Different conditions → study level. Same condition, different order → task level.
Assigning the condition — the study level
This is the between-subjects step, and Open Lab gives you two ways to do it depending on how different your arms are.
Route 1 — group-code assignment (arms differ by a parameter). When the conditions share the
same task and differ only by a value — a colour, a number, a line of instruction text — you don't
need two separate experiments. In the Study Builder, open the settings for the landing page (the
first component every participant sees) and enable group-code assignment with the
probability-based rules option. You then define your condition codes and their probabilities —
for a two-arm design, speed at 50% and accuracy at 50%. When a participant arrives, Open Lab
assigns one code and exposes it to your task as a variable (openlab_group_code). Your lab.js
script reads that variable to decide what to show — for example, "Respond as quickly as you can"
versus "Prioritise getting it right" — while the rest of the trial structure stays identical. One
task, no duplication, condition set at the study level.
Route 2 — the Between-Subjects Branching component (arms are genuinely different). When the conditions are not one task with a swapped parameter but different tasks or flows — a distinct set of stimuli, a different procedure per arm — add the Between-Subjects Branching component to the study flow and define each condition as a branch inside it. Each participant is routed down exactly one branch at random. Reach for this when a single parameterized task would strain to hold both arms; reach for Route 1 when it wouldn't.
Both routes make the decision of which condition once, at the study level, so a participant lands in exactly one arm. (Contrast this with a within-subjects design, where everyone sees every condition — there the "randomization" you care about is the order those conditions appear in, which is a task-level job, below.)
Randomizing within the condition — the task level (lab.js)
Once a participant is in an arm, everything about how they move through it is the task's job, and lab.js has purpose-built controls for it. Two are worth knowing:
- Loops repeat a template over a set of parameters — your trials — and let you choose how those
trials are ordered. lab.js calls this the sampling mode, with options including
In sequence,In random order,Sampled without replacement (in blocks)andSampled with replacement. That is how you randomize trial order or draw a random subset of stimuli for each participant. - Sequences can be set to shuffle, randomizing the order of the components nested inside them — useful for counterbalancing blocks within a task.
There are also parameter groups that allow to create independently shuffled groups. The point is that this variation happens for everyone, regardless of which condition they were assigned — it is the texture inside each arm, not the arm itself.
A worked example
A two-arm speed-versus-accuracy study makes the split concrete. Participants categorise a coloured circle by pressing one of two keys; one group is told to favour speed, the other to favour accuracy.
- At the study level, group-code assignment gives each participant
speedoraccuracy, and the lab.js task reads that code to show the matching instructions. Every participant runs the same task component; only the instruction wording differs. - Inside the task, for whichever arm they landed in, the order of the categorisation trials is
shuffled (a loop in
In random order) and the response-key mapping is counterbalanced.
Both randomizations run on the same session without colliding, because they answer different questions — which experiment versus in what order. Keeping them in their own layers is what lets you reason about each cleanly, and describe each cleanly in a methods section.
Keeping the groups balanced
Here is where online assignment can quietly beat a naive coin flip. With simple random assignment — each participant assigned independently — the arms are equal only in expectation, and small samples drift: forty participants across two arms can easily land 24/16 rather than 20/20, purely by chance.
Open Lab's group-code assignment does not use an independent coin flip. It uses minimization (Pocock & Simon, 1975) — an assignment rule that looks at how many participants are already in each condition and nudges the next assignment toward whichever arm is currently behind. Because each assignment is aware of the running totals rather than blind to them, the actual distribution tracks your specified split closely even in relatively small samples — you are far less likely to open your data and find one condition badly under-filled. (Minimization was developed for clinical trials, where balanced arms matter and samples are often modest; the same logic is what keeps a 40-person pilot from tipping 24/16.)
That does not make monitoring pointless, just cheaper. The study's Participants page shows each enrolled participant's assigned group code, so a glance tells you the current cell sizes; you can also filter or export that table to count unique participants per condition. Aim a little above your minimum per cell and the combination of minimization plus a small recruiting margin leaves every arm at target without hand-management.
Pilot the assignment before you recruit
Open Lab's demo mode ("Try demo") walks the whole participant experience — landing page,
consent, task, ending — exactly as a real participant would see it, but does not save the data so it never enters your main dataset. For a randomized study the key detail is that assignment is live in
demo: each run assigns a group afresh. So walk it several times: across runs you should see the
group code land on both speed and accuracy, with the instructions matching each time. That is
how you confirm every arm is reachable and correctly wired — the failure you most want to catch here
is a condition nobody can actually get into.
Keep the study in Draft while you do this, and switch it to Active only once you have seen every arm behave.
Where each layer's job ends
If one thing survives from all of this, make it the division of labour: the study level decides which condition; the task level decides the order within it. Ask of every source of variation whether it changes which experiment a person is in or how they move through it, send it to the right layer — group-code assignment or the branching component for the first, lab.js loops and sequences for the second — and a multi-condition online study stops being fiddly and starts being mostly bookkeeping. The good kind: the kind that makes your randomization something you can describe in a methods section without hedging, and that Open Lab's minimization quietly keeps balanced while you get on with the science.